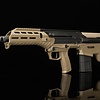
Kraken TAC-41 TDC Hopup Chamber + Cylinder Head - V2
Kraken TAC-41 TDC Hopup Chamber + Cylinder Head - V2
*This V2 version has a improved wheel section where it's now possible to use your stock silverback metal ball clicker system.
Convert your TAC-41 with the Kraken TAC-41 TDC hopup unit! A true TDC hopup unit that uses GBB/VSR style buckings, the preferred type of buckings used by airsoft snipers.
NOTE:
When using stock SBA, GBB or STALKER KRAKEN Hopup, we highly recommend to also use the STALKER Red Guide rings to ensure that your bolt goes straight into your hopup and bucking, so that your BB stopper, hopup and bucking mouth stay healthy and all have a longer lifespan.
Link To Guide Rings
Most important features:
- TDC Hopup Unit V2
- Perfectly aligned, impossible to install incorrectly.
- Special Designed TAC-41 Kraken Silent Cylinder Head with rubber anti-shock pads on the front and back (mandatory to use with Kraken TAC-41 hopup).
- GBB/VSR style buckings (Stalker TAC41 Double Fin SR hop bucking 60° included)
- Weatherproof nub compartment due to unique design.
- Clicker Wheel to use with Silverback Stock hopup Clicker Ball Plunger (Wheel Clicks)
- Can only be used with GBB barrels, recommended is the Morpheus Hybrid Barrel.
The Kraken TAC-41 set comes with:
- 1x Hopup Main Part
- 1x TDC Wheel
- 1x Flat TDC Nub (concave shape on the bucking)
- 1x Square Spacer
- 2x Different O-rings for under Hopup Wheel
- 1x Stalker Double Fin SR-hop Bucking 60°
- 1x Kraken TAC-41 silent cylinder head (nozzle inner diameter ~ 4.00 mm (4.00 mm air brake for Scorpion-Piston sold separately)
- Rubber anti-shock pads front and rear on cylinder head
- 1x O-ring for cylinder head
- 2x flat locking screws
What makes this hopup different and how does it work?
The design of the Kraken Hopup and Kraken TAC-41 Cylinder head is made in such a way that the BB is placed perfectly in the right place on the bucking patch, giving your TAC-41 the most consistent hop, leading to more range and accuracy. In addition, the cylinder head is supplied with 2 pads, which reduces the sound of contact between the cylinder and the hopup unit. Which makes your TAC41 just a little quieter.
The design of the Kraken TAC41 hopup unit makes it impossible to misalign the hopup between the hopup unit and the bucking/outer barrel. The hopup unit has 2 cutouts that work perfectly with the Stalker TAC41 Double Fin SR hop buckings. The complete hopup avoids wobbling with the square barrel spacer and 2 locking screws. The main body of the hopup has a raised lip under the wheel to prevent water from entering the TDP nub compartment.
Installation instructions/requirements:
You must have a GBB style barrel to install the Stalker Kraken TAC-41 TDC hopup unit, which can be any length you require.
Always make sure you don't have to force your bolt kit forward, if your bolt kit cant be pushed down into your lug socket, you didn't grind the bolt kit screw enough'(check video), your cylinderhead is not closed on the cylinder, or your cylinder head front rubbers are not installed deep enough.
- Disassemble your TAC-41 as described in the Silverback manual.
- Unpack your Stalker TAC-41 TDC hopup unit.
- Install the stock Silverback ball plunger clicker pin to get wheel clicks or you can choose to leave this clicker ball out and install one supplied little O-ring onto the hopup wheel portion of the main body (small O-ring).
- Install the Stalker TAC41 Double Fin SR-hop Bucking on your GBB barrel.
- Slide the main body of the hopup unit over your bucking.
- Slide the square spacer over the inner barrel with the arrow pointing to the end of your inner barrel in the hopup.
- Install the screws through the main body of the hopup unit and through the barrel spacer to lock everything in place. (Choose the correct screws for your inner barrel and do not over tighten the screws as this may damage your copper inner barrel).
- Place inner barrel + hopup in your outer barrel, making sure your spacers are far enough away from the hopup unit (towards the exit of your inner barrel).
- Place the Flat TDC Nub with the concave shape towards the bucking.
- Place the wheel gently on the hopup pillar to push the ball bearing inside, now push with your pointing finger in top of the stalker logo, nog gently turn the wheel Clockwise until the hopup thread accepts the wheel thread, DO NOT OVERTIGHT, turn the wheel gently at all time, if it doesn't go by itself, unwind and try a different position of the weel. now Install the hopup wheel onto the main body of the hopup unit.
- Disassemble your cylinder and replace the cylinder head with the supplied Stalker cylinder head.
The package contains 2 O-rings that fit around this head, make sure your cylinder seals properly, otherwise install the thicker O-ring. - Attach the supplied rubber anti-shock pads to the front of the Stalker cylinder head by removing the 3M tape and placing it in the recesses.
- Glue the rubber anti-shock pad to the back of the cylinder head with a few drops of instant glue.
- Remove the bolt/screw attached to your original bolt knob, this may be necessary if your bolt does not close properly.
- Install the cylinder with all parts.
- Reassemble your TAC-41 as described in the Silverback manual.
- Load your TAC-41 and turn the wheel clockwise to increase your hop setting or counterclockwise to decrease your hop setting.
- Have a big smile, you're ready to rock the field!
About Stalker
After good success with the release of the SRS Kraken hopup chamber, Stalker decided to also create a hopup chamber for the Silverback TAC-41. This design is another creation from the mind of Stalker. With his designs he tries to take the community into account and fulfill all the wishes of the players, and he does everything he can to incorporate his knowledge as a certified gunsmith, airsoft player and fan of the Silverback airsoft line-up. That's why Stalker products are easy to set up and work like a charm.


 HPA
HPA
 SALE!
SALE!
 Airsoft-wapens
 Stalker
 Verbruiksgoederen
 Stealth Section & Clothing
 Tactical Equipment
 Optiek
 Silverback MDRX


